You can place different images using the dedicated image data tags. This includes Intro & Full Article images, images from content, category images and even custom fields of type media.
Image Types
Intro & Full Article Images
You can output the article Intro Image with [image-intro], or the Full Article Image with [image-fulltext].
To output the url of these images instead - for instance to create your own custom <img> tag - simply add -url to the tag: [image-intro-url] or [image-fulltext-url].
Using Layout
If you want to output the images through the respective Joomla content layouts you can do: [image-intro layout="true"] or [image-fulltext layout="true"].
And you are also able to override the layout with a custom one (to be placed inside templates/my-template/html/layouts/joomla/content/), by inserting the path to your file in a layout="..." attribute.
The custom layout path starts from the layouts folder of your template, and the various subdirectories must be separated with dots. For example, to use file templates/[my template]/html/layouts/joomla/content/my-image-layout.php, the syntax would be:
[image-intro layout="joomla.content.my-image-layout"]
[image-fulltext layout="joomla.content.my-image-layout"]
Images from content PRO
The Pro version gives you the ability to place images that have been placed inside the content of the article's text:
- To place the first image, simply use
[image-1]. To place the fifth image found in the content, use[image-5]. - You can even use
[image-random]to output a random image from the content of the article. - o output the url of these images instead - for instance to create your own custom
<img>tag - add-urlto the tag. So[image-1-url]for the url of the first image and[image-5-url]for the url of the fifth image. - And you can use the
[image-count]data tag to output the total number of images found in the text, which is also available to be used in If Structures.
When placing images from content, you are also able to filter images by adding a filter attribute. This will then only return the image matching your filter. Let's say the first image in the article is cats.jpg, the second guinea-pigs.jpg and the third is pigs.jpg. Using [image-2 filter="pigs"] will show you pigs.jpg, as that is the second image matching the filter.
The Filter attribute supports Regular Expressions. For example, to only show the first image from the article that contains either "dog", "hound" or "pug", you can use: [image-1 filter="(dog|hound|pug)"].
YouTube Thumbnail PRO
The Pro version gives you the ability to get the youtube thumbnail image from YouTube videos that have been placed inside the content of the article's text (via the youtube iframe code).
You can output the thumbnail image itself with [youtube-...-thumb], or just the url with [youtube-...-thumb-url].
Category Image PRO
The Pro version allows you to output the image attached to the category of the article.
You can output the image itself with [category-image], or just the url with [category-image-url].
Media Custom Fields PRO
The Pro version also allows you to output the image from a custom field of type media attached to the article.
You can do so by simply using the name of the custom field, such as: [my-image-field].
To instead output the url of the image, as saved in the database, you can do: [my-image-field output="value"].
Image Attributes PRO
For any of these image types, you can also output their other parameters or attributes found inside the <img> tags, such as:
[image-intro-alt], [image-fulltext-caption], [image-1-width], [image-2-height]. etc...
For instance, [image-1-width] will output whatever is found in the width="..." attribute of the first image in the article. If the attribute is not found in the <img> tag, it will simply return nothing.
Adding or overriding attributes
In any [image-...] tag, you can override any attribute or set extra attributes to be used in the final <img> tag.
For instance, you can set the width and height attributes, or override the class name:
[image-3 class="my-new-class-name"]
[image-intro width="200" height="150"]
When you set width and height attributes, Articles Anywhere Pro will take advantage of the image resizing feature.
Auto Alt/Title Attributes PRO
The Pro version comes with the ability to automatically set the Alt and Title Attributes for any [image-...] tag placed through Articles Anywhere, with options to base them on the image File Name, the Article Title, the Category Title, and more.
The preference can be set for each image type in the Articles Anywhere Plugin Settings. And it can also be individually overruled for a specific {articles} tag via a auto_titles="..." attribute.
The Auto Alt/Title Attributes only apply when the image doesn't already have its own attributes specified.
When basing the attributes on the image file name, you can also select how they should be Cased. You can set them to be lowercase, UPPERCASE, Uppercase only the first letter, Uppercase All Words, or Smart Titlecase (which allows you to input a list of words that should remain lowercase).
For example, this allows the Alt/Title attributes for an image called soft-and-fluffy.jpg to be automatically set to “Soft and Fluffy”.
The Case setting can also be set in the Articles Anywhere Plugin Settings, or individually overruled via a auto_titles_case="..." attribute.
Image Resizing PRO
The Pro version of Articles Anywhere has the ability to automatically create resized images with your specified width/height, instead of outputting the original image files.
Settings
You can control the default behavior of the "Resize Images" feature via the Articles Anywhere system plugin settings, with three alternative options:
- No - Don't resize images
Images will NOT be resized when setting width/height attributes in[image-...]data tags.
The original image file will always be used, and will only be shrinked to the specified dimensions.. - Standard (default setting) - Only resize when dimensions are given
Images will be resized and output based on the width/height attributes in[image-...]data tags.
If no width or height attributes are found in the data tag, the original image will be used. - Yes - Always resize images
Images will be always resized.
If no specific width or height attributes are found in the data tag, the image will be resized based on the dimensions in the default settings.
In any case, you can also individually override/force this setting in a specific [image-...] data tag by adding a resize="..." attribute with either a true (Yes) or false (No) value:
[image-fulltext resize="true"]
In the Default Settings you can also set the quality of the resized images, select the filetypes to do resizing on (gif, jpg, png), and decide whether you want the images to be cropped or not.
Resized image files are stored inside a subfolder of the location containing your original image. By default, the folder name is resized, but you can customize it however you want.
Note: Only internal images hosted on your website will be resized. External images will not be resized or saved, and the original external images will be used regardless of the settings.
Data Tags Syntax
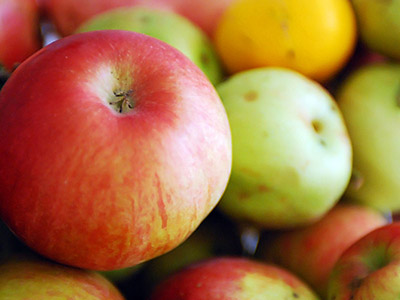
When resizing images via the [image-...] data tag, you don't need to specify both width and height attributes. You can also just specify one dimension, and the image will be resized maintaining its aspect ratio:
[image-fulltext width="240"]
<img src="/images/gallery/resized/apples_240x180.jpg" alt="Apples" width="240" title="Apples" height="180" />

When you specify both width and height attributes, resized images will be created with the exact width and height, meaning that if proportions are different, the image will be cropped to fill the specified dimensions:
[image-fulltext width="240" height="240"]
<img src="/images/gallery/resized/apples_240x240.jpg" alt="Apples" width="240" title="Apples" height="240" />

Using the [image-random] tag described in "Images from content", you can make cool stuff like this:
[image-random width="130" height="40"][image-random width="30" height="40"][image-random width="80" height="40"]
[image-random width="200" height="80"][image-random width="40" height="80"]
[image-random width="60" height="60"][image-random width="40" height="60"][image-random width="140" height="60"]
![]()
![]()
![]()

![]()

![]()

(Refresh the page to see the above images change on every pageload)
Custom Images / Suffixes
You can also output images with a suffix of your choice added to their filenames. You will need to create these images yourself, and name them using the given suffix.
Let's say you have this <img> tag in your content: <img src="/images/my-image.jpg" />.
Then you can do [image-1 suffix="-custom"] to output: <img src="/images/my-image-custom.jpg" />.
This could be useful to be used in If Structures to conditionally output alternative custom images in certain situations. This example will show a different image to guest users:
{if user:guest}[image-1 suffix="-guest"]
{else}[image-1]
{/if}
Visible to guests:
Visible to logged in users: